Often, when working on a project, it is necessary to make an opening in the wall. In the case of e.g. office interiors, this applies to placing glass walls in a plasterboard wall or to open rooms. It is worth considering at the beginning how they will be performed, because it affects parameters such as the area of the rooms.
Assuming that the requirements are:
• Easy to edit
• Correct wall areas
• Correct calculation of the room area
• Possibility of creating openings in non-perpendicular walls and those built on an arch
solutions are presented below with an overview of their pros and cons:
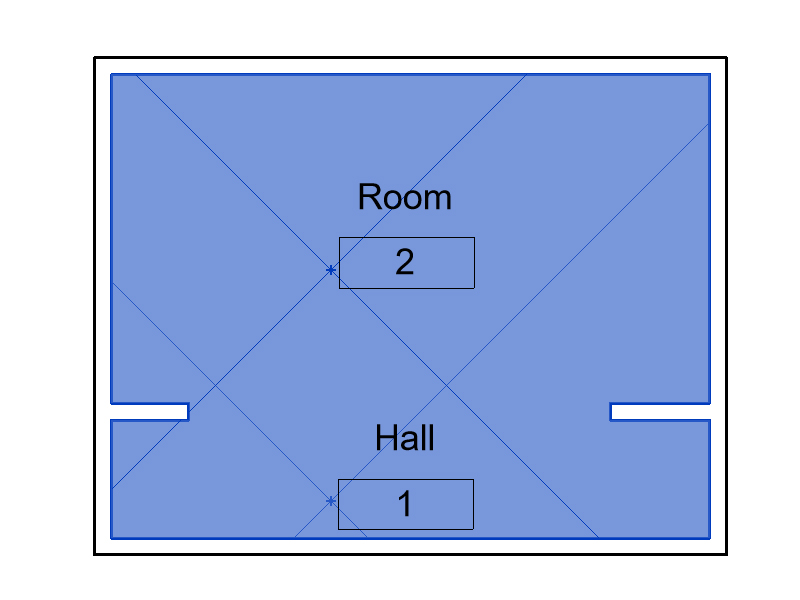
1) Opening: Wall
This is one of the functions on the Architecture tab

The opening is created by clicking on the wall, then giving it width and height.
➖ Editing is relatively simple. The width is not controlled by the parameter, but the dimension on the projection.
➕ The wall area is reduced by the area of the opening.
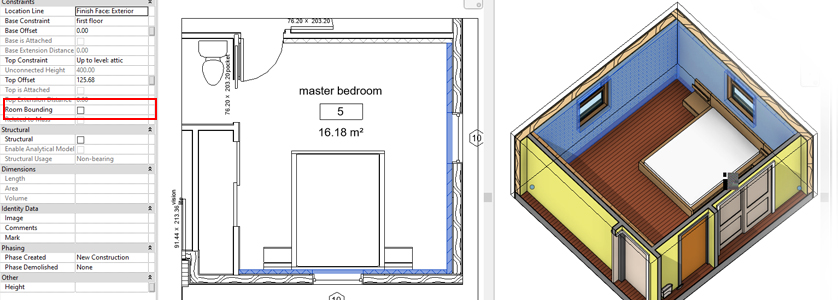
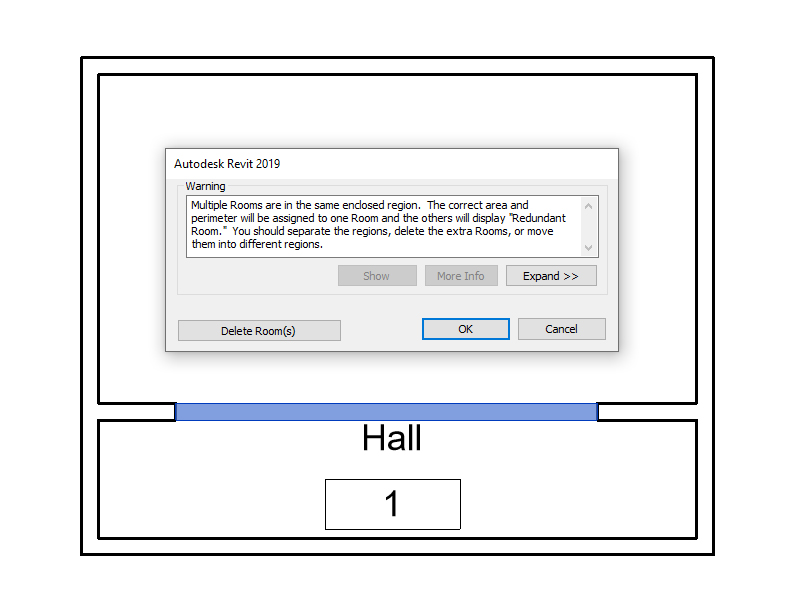
✖️ If the opening is at the height at which the room area is calculated, there will be an error of overlapping rooms.
It is possible to change this height, but it will not comply with the standards and may disturb the calculation of the area and volume of the rest of the rooms.
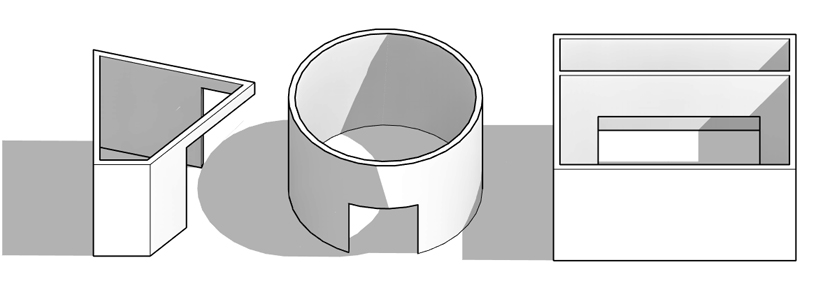
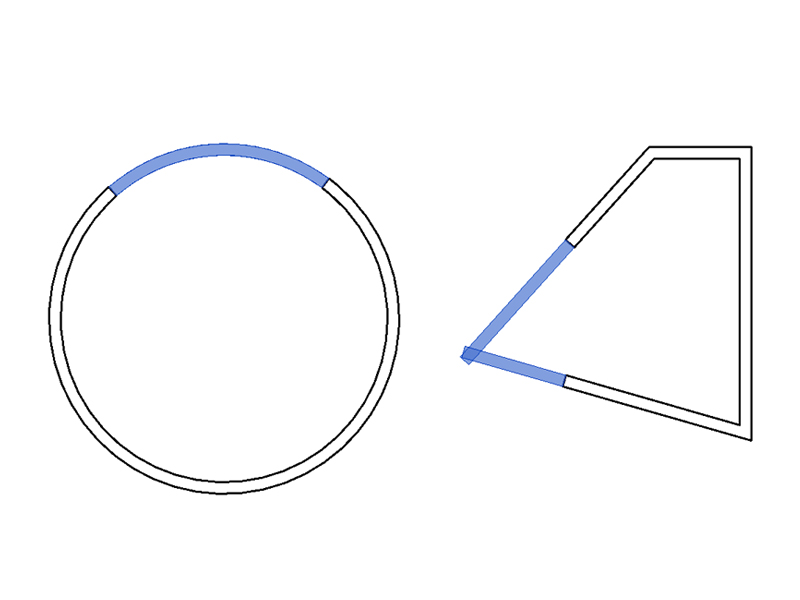
➕ This option gives the possibility of free and convenient creation of holes in arched and non-perpendicular walls (with appropriate wall connection)
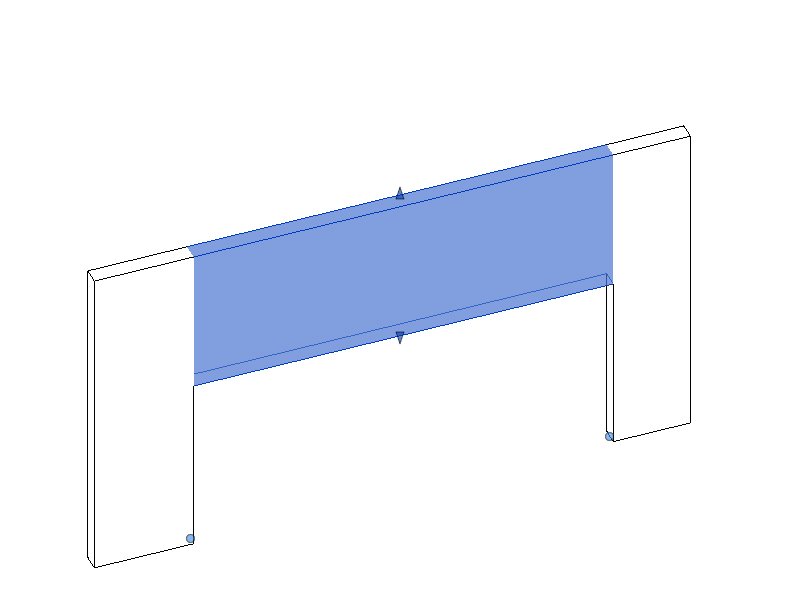
2) Edit profile
The Edit profile option is available after selecting the wall in the Modify tab
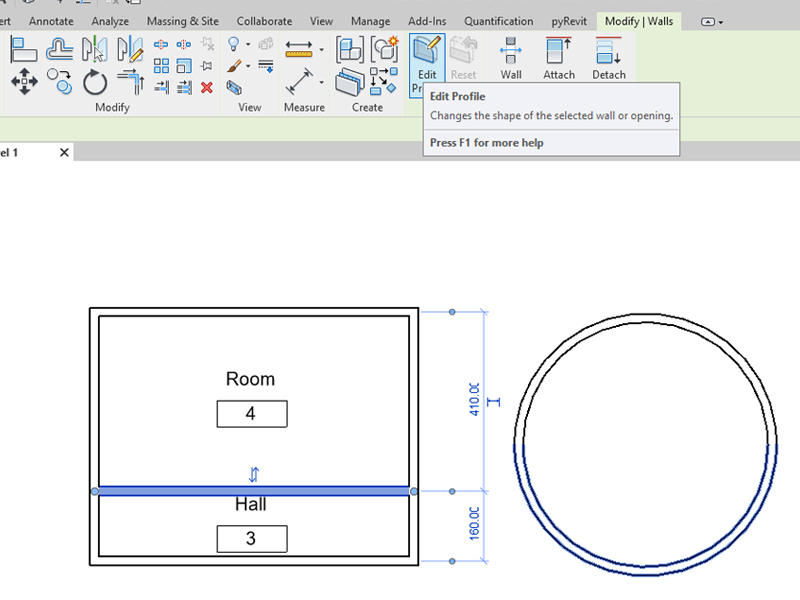
➖ Editing the opening is difficult because it cannot be done on plans (elevations and 3D view are available). The width is not available from the parameter level, it requires adding an annotative dimension.
➕ The wall surface is reduced by the area of the opening.
✖️ If the opening is at the height at which the room area is calculated, there will be an error of overlapping rooms as in the case of Opening: Wall
➖ This option can be used for non-perpendicular walls but is not available for walls built on an arch.
3) Wall above the opening
The opening is created by creating the wall over the opening
➖ Editing the opening is simple, but its width is not available from the parameter level, it requires entering an annotative dimension. It also requires the appropriate setting of view ranges, because the wall is created above the cutting level.
➕ The wall area is correct
✖️ If the opening is at the height at which the area is calculated, there will be an error of overlapping rooms as in the previous two cases.
➕ Creating openings in the walls built on an arch and perpendiculars is not a problem.
4) Door opening family
Using and editing the Doors: Opening family available in Revit libraries, you can make an opening in the wall. The opening is created by selecting a family. The changes I made in it were changing the Width parameter from Type to Instance.
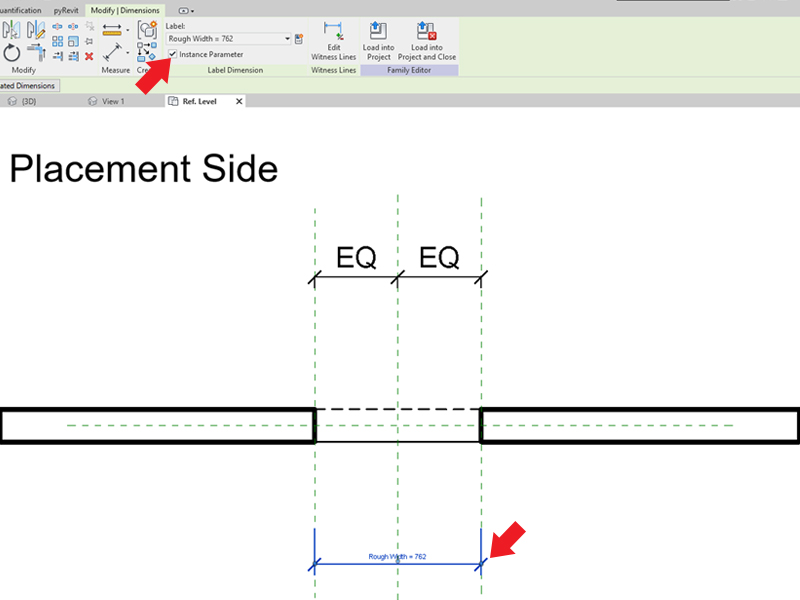
Also, I recommend removing the masking element in the family Ref. Level. Thanks to this, if you create a curtain wall in this place, it will be visible. I leave the opening height as a type parameter because I often work on projects where there are 2 types of height and height information as a type parameter is useful.
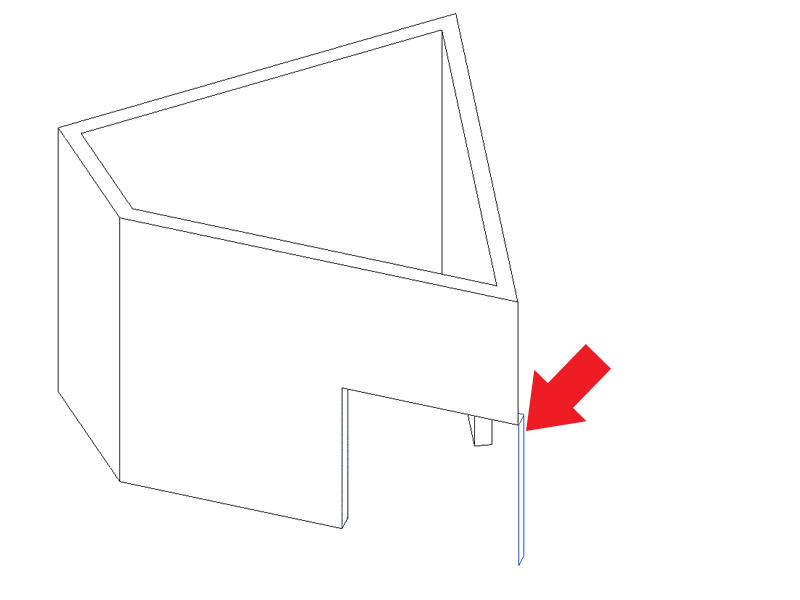
➕ Editing an opening is simple. After changing the width to an instance parameter, you can use blue arrows or information in the element’s properties.
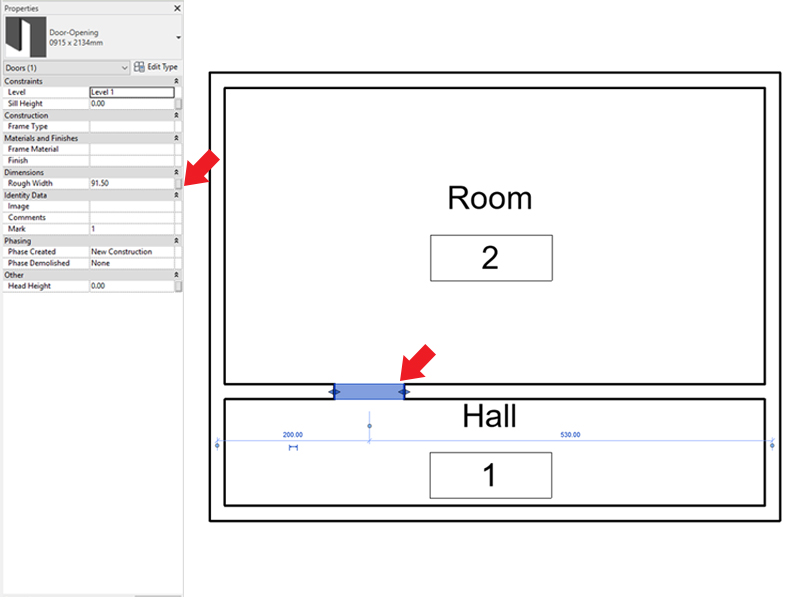
➕ The wall area is reduced by the area of the opening.
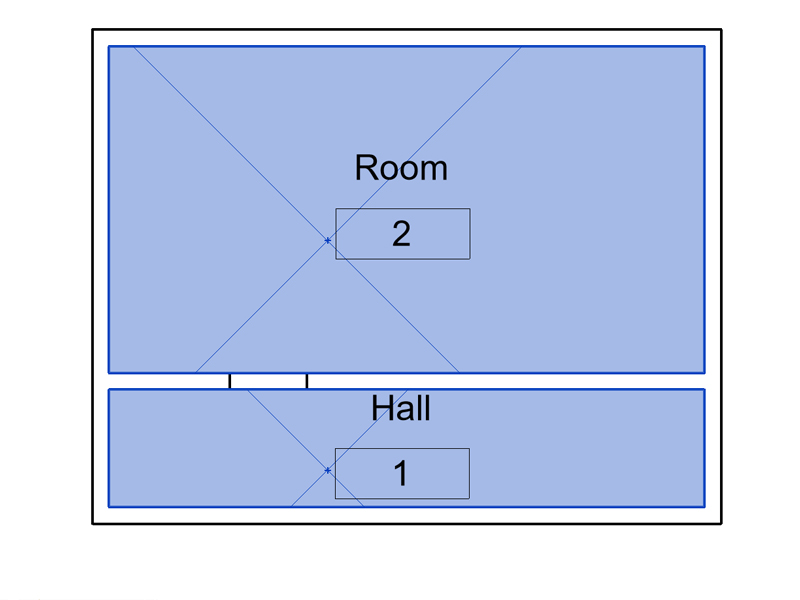
➕ There is no problem of overlapping rooms, so their area is calculated correctly.
➖ Creating openings in walls built on an arch is possible, but graphically it gives a worse effect than using the Opening: Wall function.
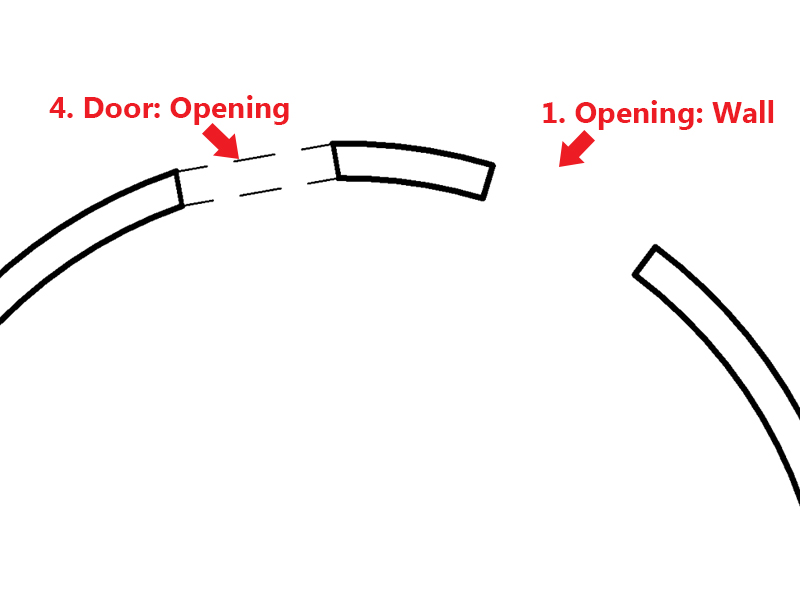
Creating tangent openings in non-perpendicular walls is possible, but requires further graphic editing of the family. The protrusion of the family outside the holes is visible when it is selected.
➕ ➕ However, two other very big advantages of this solution should be noted: placing the lintel in the opening family and the possibility of including openings in schedules.
Conclusions: The method of creating openings in the wall should be adapted to the project and the priorities we follow. In my opinion, the best method is 4) Door opening family, because the priority for me is the correct area of the rooms and the lintel. For projects where there are many walls built on an arch or non-perpendicular with openings in their corners, I would consider using the 1) Opening: Wall method because of the ease of editing. The problem of overlapping surfaces can be solved by adding Separation Line (when there are few such places).